Atchison Hospital is grateful for the support we have received from those who have reached out to donate supplies, equipment, and resources. The community has been incredibly supportive for our front line workers during this COVID-19 public emergency.
We have had many community members reach out about making face coverings to help protect our community from the spread of COVID-19. To help facilitate these donations, we are providing some patterns and tutorials for both a no-sew basic mask as well as a sewn face mask that uses either elastic or ties. Both options provide the ability to add a filter if desired, such as a coffee filter as suggested by the CDC.
We will collect donations in our lobby and share the donations with the Salvation Army in Atchison. If you do not have the capability to make your own mask, you can check for a donated mask at the Salvation Army or contact them through their Facebook page. Of course, supplies depend on the availability of donations so please be understanding if masks are not available when you check.
The CDC now recommends wearing cloth face coverings in public settings where other social distancing measures are difficult to maintain, such as getting groceries or going to a healthcare appointment. This is to protect people around you if you are infected but do not have symptoms. You can learn more on how to wear and care for face coverings on the CDC website.
Face covering patterns and tips
There are many patterns for making face coverings, from a basic no-sew pattern to patterns to be sewn with elastic or ties. We have noticed that the shaped, fitted homemade masks tend to need to be fitted to the size of an individual’s face – they are often too large or too small when made in bulk. For donated masks, we recommend a pleated or adjustable version. Below are some resources for making homemade face masks.
How to donate a mask
Once your masks are complete, place them in a plastic bag and bring them to our main entrance. You do not need to provide the filter with the donation, as these are optional and can be added by the user if desired. Location for donations:
Atchison Hospital
800 Ravenhill Drive, Atchison, KS 66002
If you need a mask
If you do not have the capability to make your own face covering, you can ask for a donated mask at the location below. Please understand that there is a very limited supply of these donated masks and there is no guarantee of availability.
Salvation Army
926 Commercial Street, Atchison, KS 66002
Thank you to Masks 4 All for pattern and video for t-shirt face covering and Sarah Maker for sewn pattern and video.
No-sew face mask
What you will need
- T-shirt, preferably 100% cotton
- Scissors
- Safety pin
- Coffee filter or paper towel
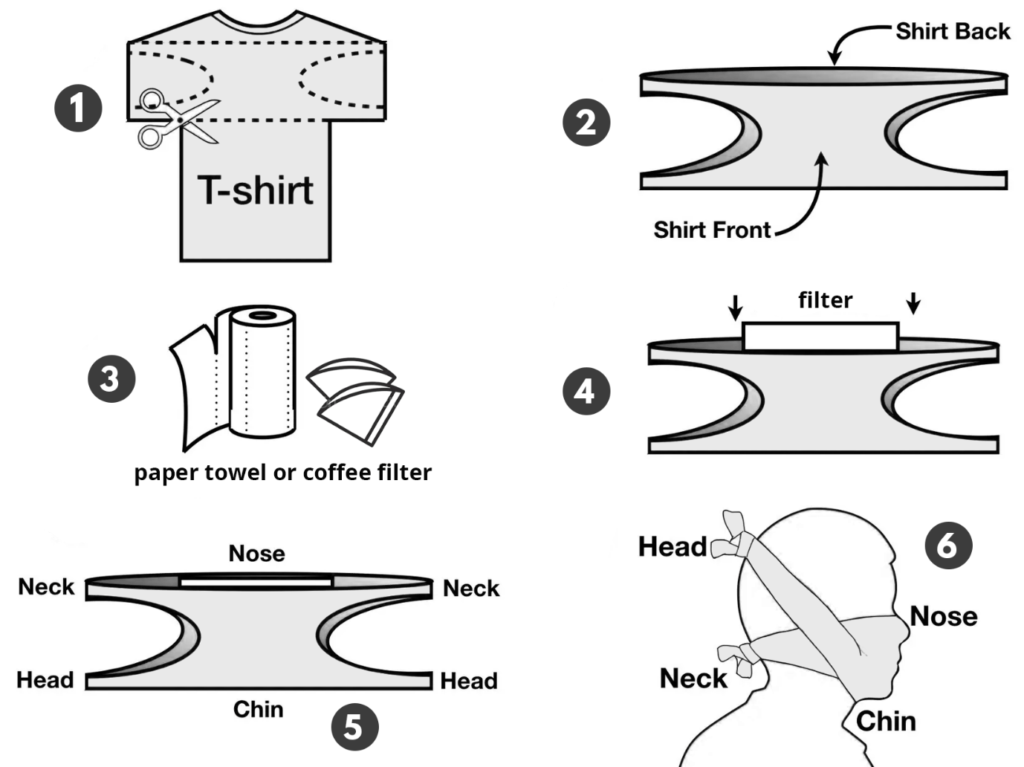
What to do
- Outline the pattern of the mask on the t-shirt. The bottom line should go just beneath the armpits of the shirt. Make sure the part that goes on your face is large enough to cover your nose and mouth.
- Cut along the lines through both sides of the shirt so that your mask has two layers.
- Place a safety pin along the bottom and insert the coffee filter in between the two layers of the T-shirt. This acts as an additional filter, and rests on top of the safety pin.
- Secure the mask around the front of your face, covering your nose and mouth. Tie the top straps under the back of your head and the bottom straps at the top of your head. That will ensure a nice fit underneath your chin.
Video tutorial – https://youtu.be/hVEVve-3QeM
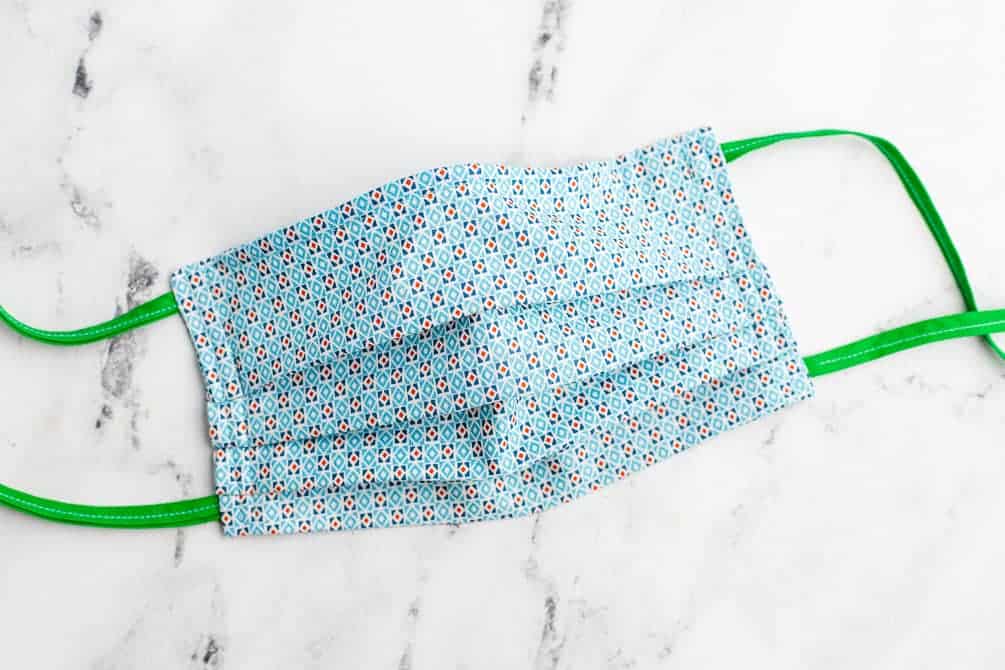
Sewn face mask with filter pocket
What you will need
- cotton fabric, tightly woven
- 1/8″ elastic*
- sewing machine and thread
- scissors
- ruler
- sewing pins or clips
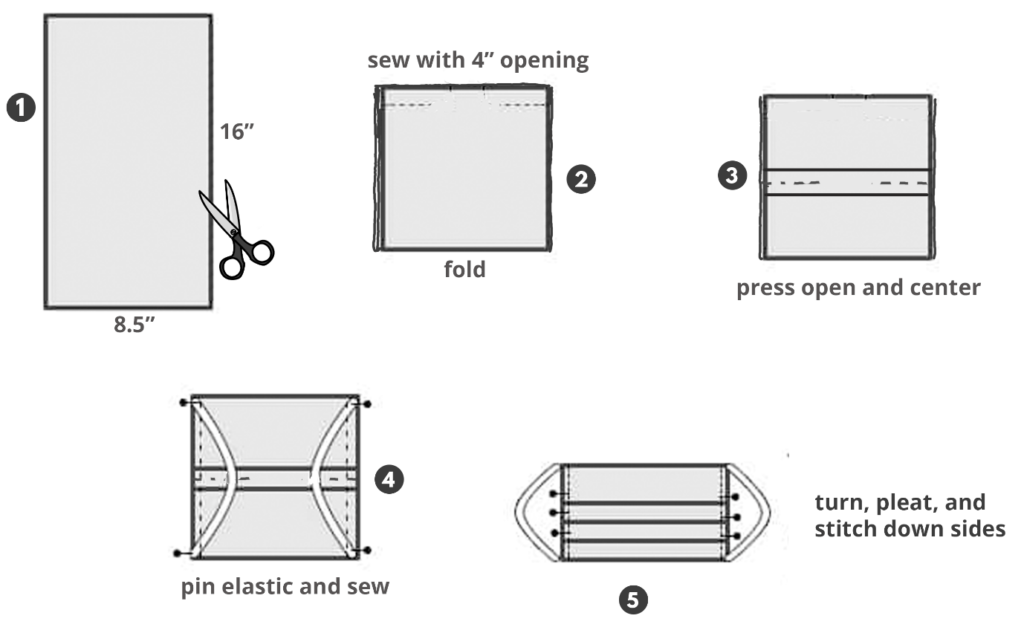
What to do
- Cut one 16”x 8.5″ fabric rectangle and two 7” elastic pieces for an adult or one 14″x6.5” fabric rectangle and two 6” elastic pieces for a child.
- Fold in half with right sides together and sew along top edge, leaving a 4” center opening for the filter pocket
- Press seam open with fingers or an iron and reposition so that it is in the center of the mask. Pin the elastic or ties* onto the corners of the mask. Sew along each side.
- Turn the mask right side out using the pocket opening. Fold 3 evenly spaced ½” pleats. Pin in place and sew to secure.
- *If you prefer ties instead of elastic, cut four 18”x1.75” pieces. Fold the long sides to meet in the middle, then fold in half again to encase the raw edges. Stitch down the length of the rectangles along the edge to create the ties.
Video tutorial – https://youtu.be/6gcLp0y-Mfg